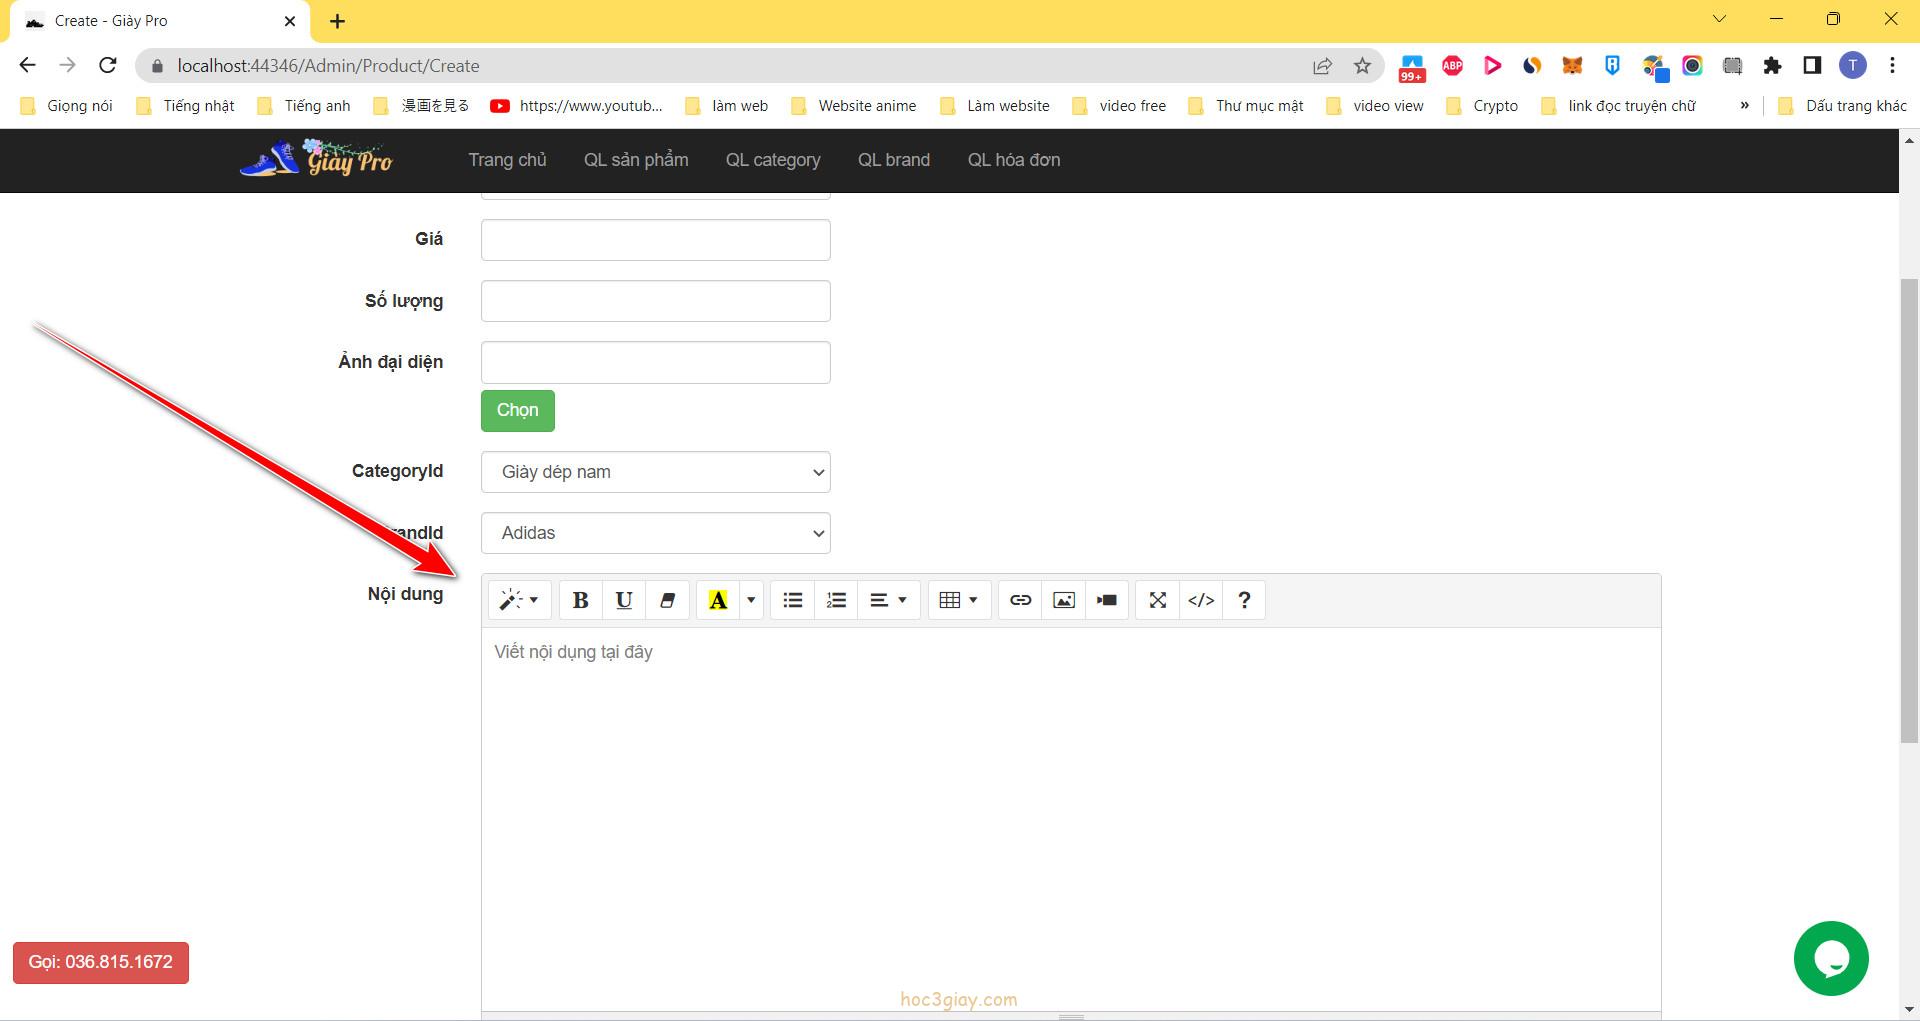
Text Editor là một trong những công cụ không thể thiết trên một website. Vậy thì làm cách nào để tích hợp được nhanh tính năng này trên website asp.net mời các bạn cùng theo dõi mình bên dưới đây nhé.
Cách thêm công cụ text editor bằng summernote trên website asp.net
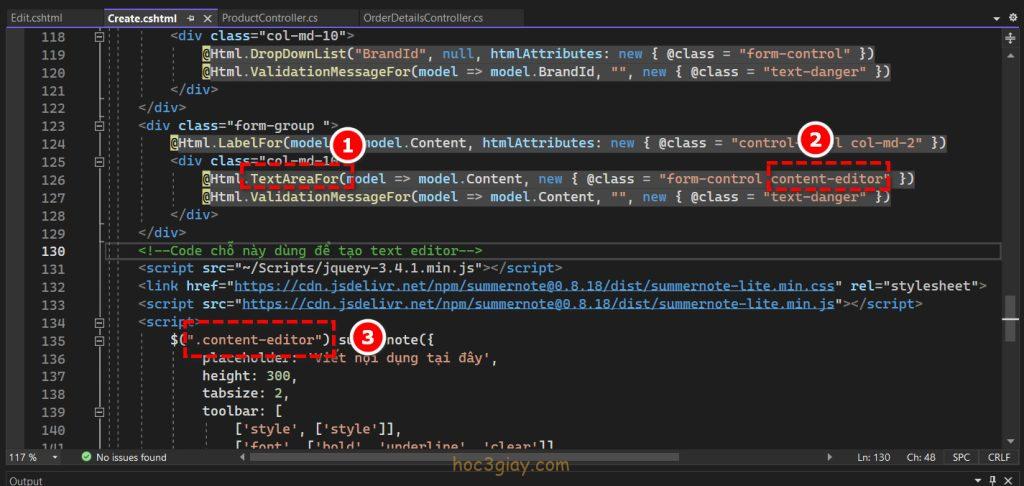
Bước 1: Chỉnh sửa phần textbox content của website thành method TextAreaFor, và thêm một class tên là content-editor (hoặc tên bất kỳ).
<div class=”form-group “>
@Html.LabelFor(model => model.Content, htmlAttributes: new { @class = “control-label col-md-2″ })
<div class=”col-md-10”>
@Html.TextAreaFor(model => model.Content, new { @class = “form-control content-editor” })
@Html.ValidationMessageFor(model => model.Content, “”, new { @class = “text-danger” })
</div>
</div>
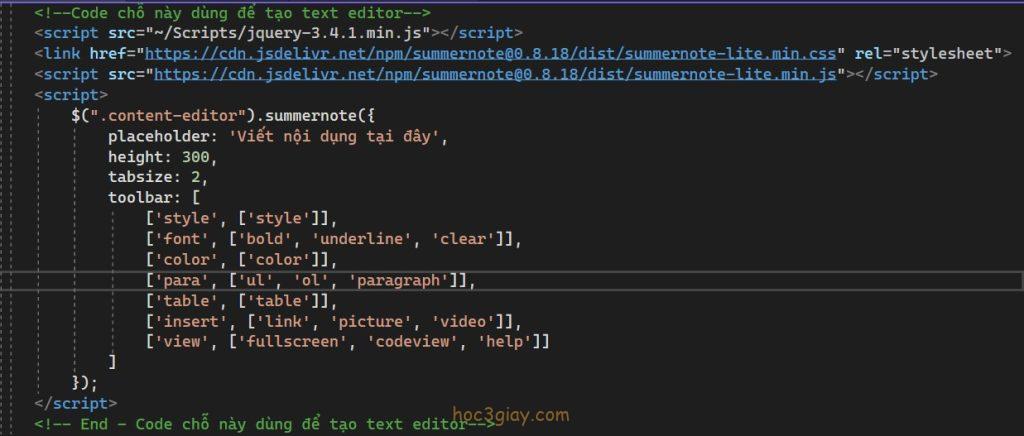
 Bước 2: Copy dòng code bên dưới và dán xuống dưới đoạn code trên đây.
Link code bên dưới tại đây.
<!–Code chỗ này dùng để tạo text editor–>
<script src=”~/Scripts/jquery-3.4.1.min.js”></script>
<link href=”https://cdn.jsdelivr.net/npm/[email protected]/dist/summernote-lite.min.css” rel=”stylesheet”>
<script src=”https://cdn.jsdelivr.net/npm/[email protected]/dist/summernote-lite.min.js”></script>
<script>
$(“.content-editor”).summernote({
placeholder: ‘Viết nội dụng tại đây’,
height: 300,
tabsize: 2,
toolbar: [
[‘style’, [‘style’]],
[‘font’, [‘bold’, ‘underline’, ‘clear’]],
[‘color’, [‘color’]],
[‘para’, [‘ul’, ‘ol’, ‘paragraph’]],
[‘table’, [‘table’]],
[‘insert’, [‘link’, ‘picture’, ‘video’]],
[‘view’, [‘fullscreen’, ‘codeview’, ‘help’]]
]
});
</script>
<!– End – Code chỗ này dùng để tạo text editor–>
Bước 3: Thêm dòng [ValidateInput(false)] bên trên method của controller mà bạn đang thêm công cụ text editor này.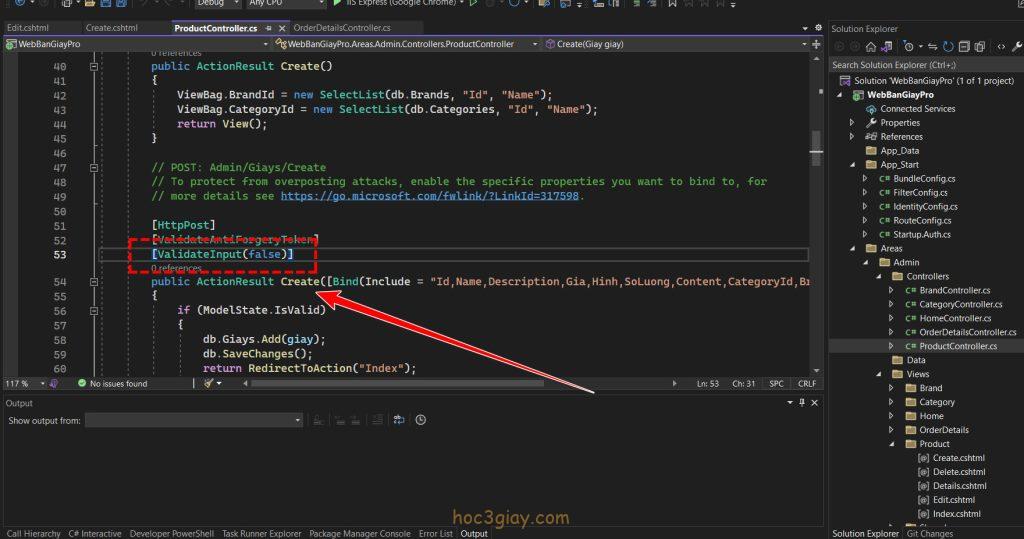
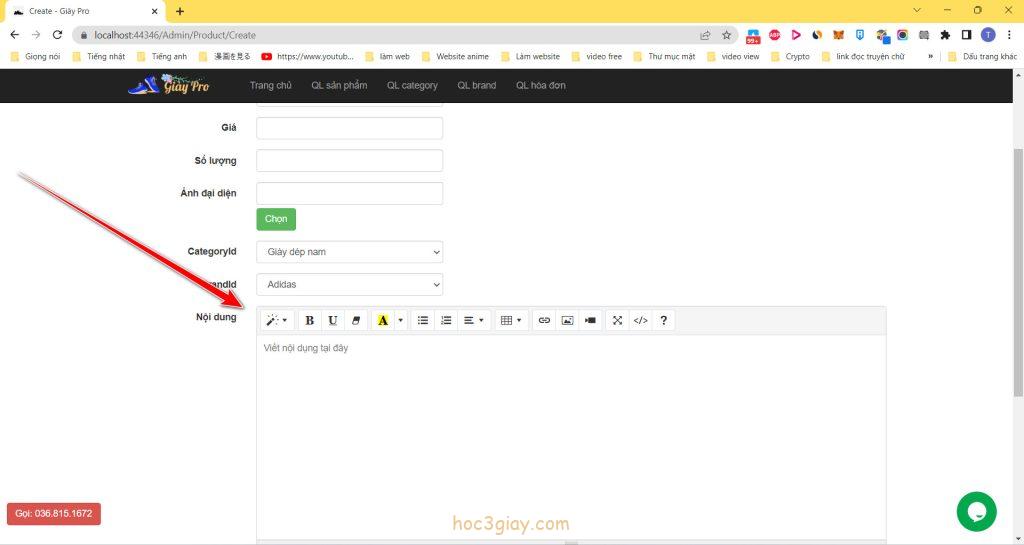
Vậy là xong rồi đấy, bạn chạy chương trình và ta có được kết quả như bên dưới!

